Showing posts with label renovations. Show all posts

Saturday, January 28, 2012

{pretty, happy, funny, real} the living room edition

~ Capturing the context of contentment in everyday life ~


Last week I was having some serious contentment issues with my living room.

Though we make do with lots of thrifted and hand me down furniture, this room was driving me crazy. I looked around and there wasn't one thing in it that I liked. I was not happy.

I can't really find many good "before" pictures, but I'll give you an idea.

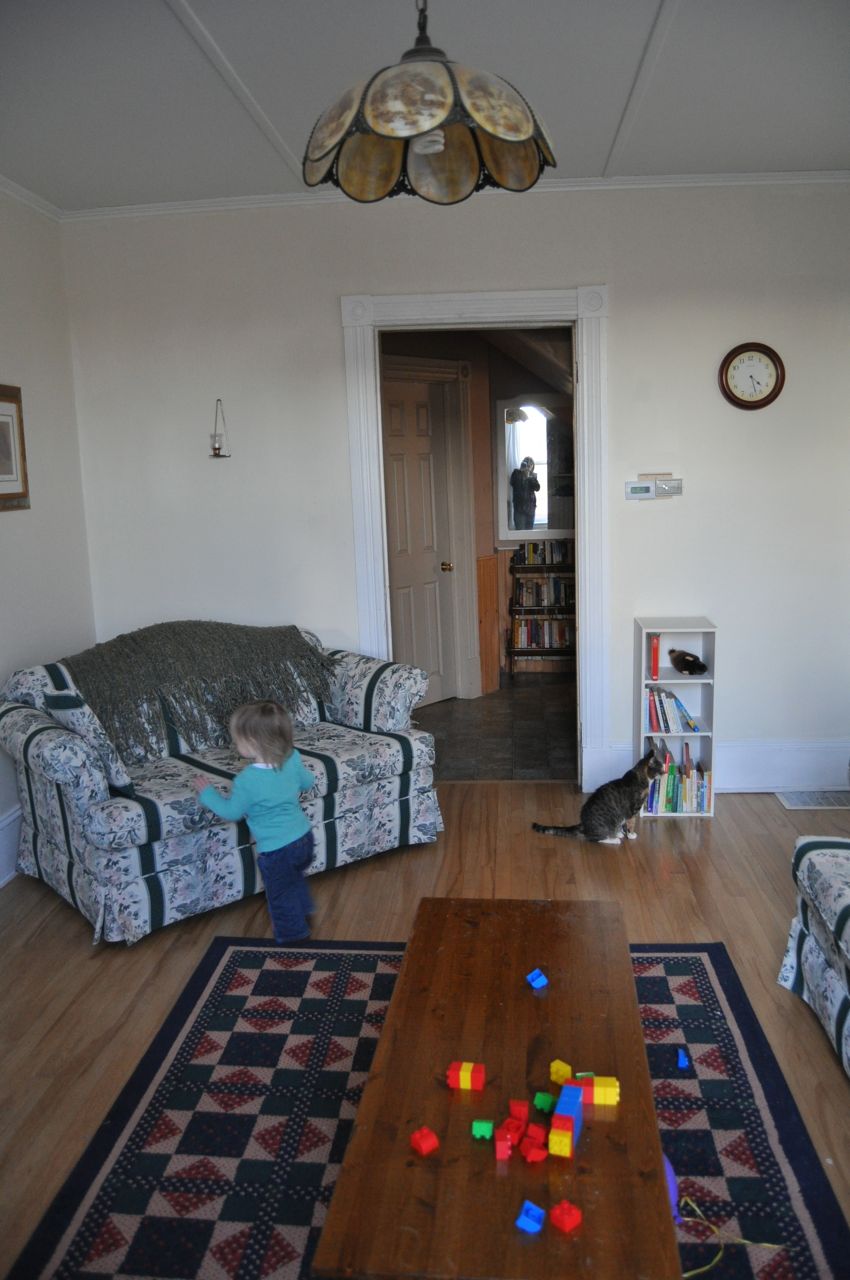
Here is the room at its best, decorated for fall. 
The couches are comfortable enough, and purchased very cheaply when we first moved to the island and didn't have anything on which to sit. But I don't like the colour and pattern.  The rug that we got for cheap to keep the floor warm actually matches the colour of the couches and matches the rusty colour of my great-grandfather's old recliner (complete with duct tape). It almost looks like I planned it!!

The other furniture is a mish-mash of styles and wood finishes. The only thing I really like is the coffee table, which Micah designed and made.

There's a brass lamp, very functional, not my style.

Due to the placement of outlets, there's only one place to put the tv. It's a big old tv that we have to whack from time to time to get the picture to appear, with rabbit ears sitting on top, and the surround sound wires and speakers are hard to confine.

The room is also awkward for furniture placement, because there are 2 regular sized doors and a set of double french doors leading into the room.

There's only one coat of off-white paint on the walls. You can see where the previous owners cut in a second coat around the trim. The white curtains were hanging from a tension rod inside the window frame, crowded into the narrow frame, in need of hemming, looking very blah against the walls.

Here you can kind of see the curtains, and part of the tv in the corner,
blocked off by some furniture to keep this little bundle of mischief away. 

And the room also needs to be safe for Arden to play in, as it's where most of her toys and books are.


I looked around and felt VERY discontent. I was on the point of doing something drastic - looking online for new couches, or at least new couch covers (which are very expensive!), searching for new rugs, thinking of switching the contents of this room entirely with the room next door (our music room and library), sampling paint colours. . . in other words, I was on the verge of spending a lot of money we didn't have!

So I called Mom.

I vented my frustration to her. That felt good! After talking it out, I realized that part of the problem was the room just didn't feel like "me." Other than the coffee table and a plaid wool blanket I brought home from Scotland, there was nothing really personal in the room. Nothing to make it feel like home, like our living room, instead of a second hand show room. We talked about a few different things I could do with the stuff I already had. After hanging up, I felt much better.

I prayed for some contentment and some creativity. And then got to work with a determination to make a difference.

The results aren't drastic at all, but they do feel different to me.

Here comes the {prettier} and {happier} part.

The main thing I did was add one of my big bookshelves to the room. I put some of Arden's toys on the lower shelves, and picture books and my LM Montgomery collection on the higher shelves, accompanied by a few little knick-knacks. I think it helps give the room more presence and personality.

It feels more balanced to me now.

I do love my books!

My little Gog and Magog.


I got rid of the big dark end table (dark wood is not so much my thing) and used one of my little pine tables instead.

While I'm not sure these curtains are the best fit for this room (at least with the colour it is currently painted), I did spend $9 and bought a proper tension rod that fits up inside the valance, so the curtains aren't squished into the frame or piling up on the floor. The valance is not centered over the window, which I find odd, especially when the curtains are open. But it's better!


Right now the chair is pushed against the tv to keep Arden from turning on the power to the whole tv set up.

And here is the room from a few other angles.

French doors which lead into the music room/library. 

Door to the hallway.

Thus endeth the tour.

I would still like to paint the walls, which is in our budget for the next few months. I'm not sure how to best work with the furniture though. I could do a richer creamy colour. I'm also considering a netural sort of understated green. Green is very tricky. I also want something to complement the music room/library next door, since the rooms are often open to each other. (That room only has white primer on the walls right now, so it will need to be painted too.) Any ideas??

I have a few items which are my palette inspiration, but it's too dark to take any good pictures at the moment, so maybe I'll show them next week!

BUT, my victory consists in the fact that I overcame my discontent, made some changes with what I had on hand, and am now feeling more positive about the room and its future! :)


{funny} & {real}

This is the light fixture in the living room. It's just not the right kind of vintage to be considered pretty in my books!


The exposed spiral bulb is classy, don't you think? What a nice yellow glow it casts over the room. Eek. I am on the lookout for an inexpensive replacement!


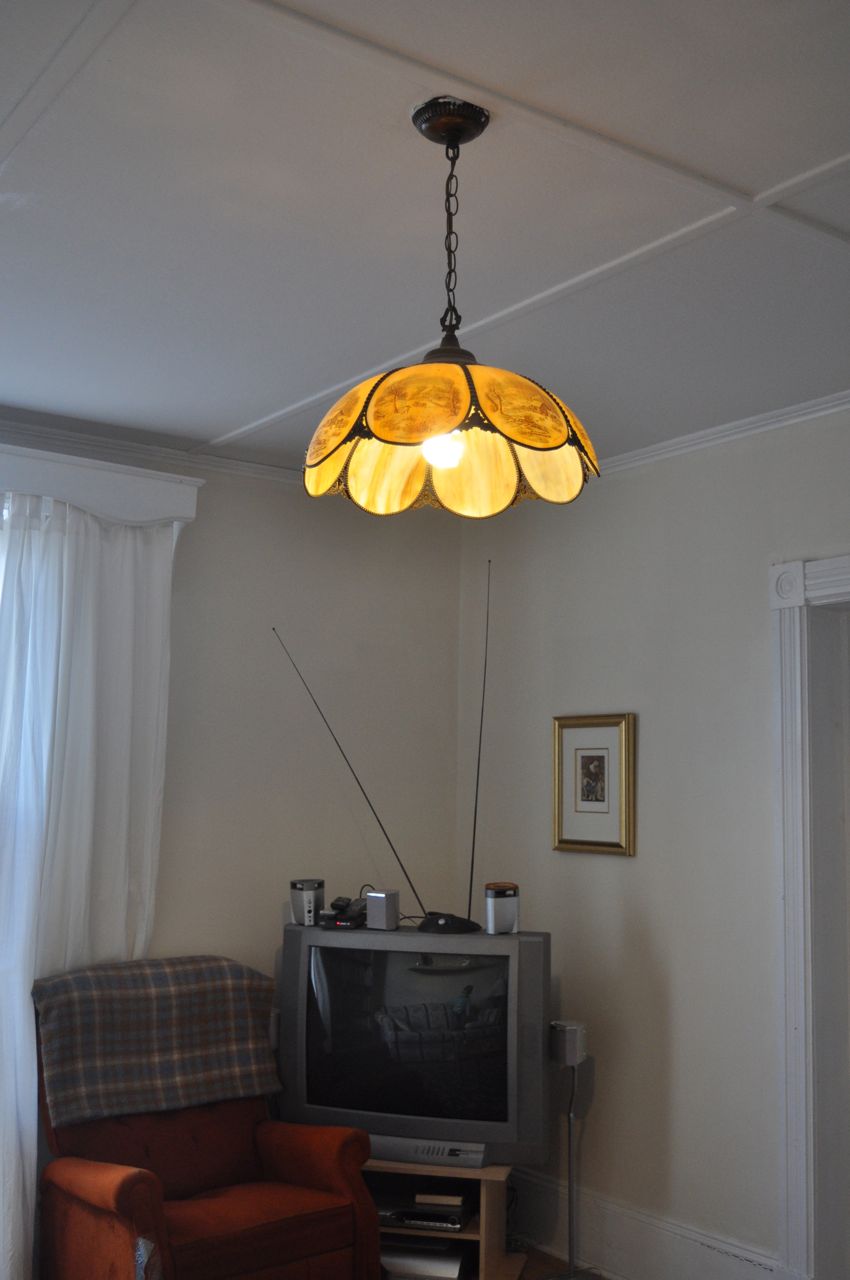
And in the meantime I will try to ignore it.


round button chicken


~lg

Sunday, December 4, 2011

Dining Room Transformation - Happy!


Also joining in with Like Mother, Like Daughter for {pretty, happy, funny, real}
Capturing the context of contentment in everyday life. 

round button chicken


(Sorry this is such a long post, but I figured I'd combine {p,h,f,r} with a renovation post and kill two birds with one stone.)

And now I would like to present - the transformation of our dining room! Oh happy day! What started as dark and outdated has turned into bright and cheery. This is more than our dining room - it's an extension of the kitchen, the room we spend most of our mornings in, the room that ends up being my office (bill paying, menu planning, blog writing, etc.) the only room on the main level with a fireplace, and basically an all purpose room. It has a north and east facing window, so it only gets a little natural light in the mornings.

The look I was going for was kind of Scandinavian-farmhouse-kitchen. You can tell me if you think it resembles that at all, but whatever it's called, I like it much better now!

The best way to describe its different stages is to show its different stages. So here you go - a pictorial account of our dining room's last two years.


To begin, this is the dining room as we first saw it, when we first viewed the house before purchasing, back in March of 2010.

The room as we first saw it was basically empty.
Note the brown-green wainscoting and rather dated stripey grape wallpaper. 

I mean, it was all very coordinated, but not my style!!

Lots of doors and stripes! Requiring lots of imagination.


The next phase is one of simply living in the room, as it was, for a year. It wasn't that bad. I almost got used to it. It fit the old house in a funny kind of way. But not in a me way. And it was waaaay too dark. 

We didn't do much, other than trade in the brown curtains for white and put some furniture in. Oh, and a baby!


I think this was taken around Christmas last year. We added a comfy
chair by the fire for chilly mornings and morning devotions
 overlooking the river. 

With a few Christmas decorations and our now dearly departed Mr. Tilley. 

And now the fun begins! 

The first stage of destruction occurred in July. Taking advantage of willing family members visiting "from away," we got to work on stripping the wallpaper! Hooray! 

This is actually a picture of the table set for brunch for Arden's Dedication!
But you can see the wall in the background that I had stripped months
 earlier in a fitof SAD-induced frenzy. 

And with the brunch dishes still on the table, we started on the wallpaper!

Aunt Karen and Mom - happy as clams in mud. 


It was quite a job, especially to get that under-layer off the plaster. Thankfully, there was only one layer of wallpaper to contend with. 

The previous owners, at some point in the house's history, had stripped the original layers of wallpaper, with the exception of a few stubborn patches that they didn't bother getting off. They then patched the plaster in various places with drywall mud, and also put in a few sections of drywall where the plaster must have been damaged. Because they never intended to paint it, all this patching and mudding was done quite roughly. They also mudded over sections of old wallpaper. This posed a real problem for us, since we were trying to get every last bit of paper off the plaster. We simply couldn't, without pulling off large amounts of mud with it. 


Here's a little bit of that old wallpaper stuck to the plaster. And part of the
wainscoting, which I also started stripping to see how big of a job that
would be. Too big, as it turned out. 

Then came the dilemma - what to do to get the walls paint ready? We looked into getting a skim coat of fresh mud over the whole thing. But with a $500 price tag, we decided we could figure something out on our own! 

The solution, costing very little money and very much time, brought to you by the friendly and knowledgable people at Benjamin Moore: 
Step 1: Prime the walls with a thick coat of oil-based plaster-friendly primer-sealer, covering plaster, wallpaper, mud and all. 
Step 2: Try our own skim coat of mud over the worst places. There were holes and dips that needed to be filled, and places that really needed to be built up to cover drywall patches and extra layers of mud and wallpaper, and just general smoothing to make it look like an even surface. 
Step 3: Reprime the whole thing. Did I mention this room has 4 doors, 2 windows and a chimney. LOTS of cutting in required. 
Step 4: Paint with colour.

The next phase of the transformation happened in August, and was due to the lovely painting fairies from Newfoundland, Granny Raymer and Aunt Alison! 

They accomplished Step 1 of the walls, which was a good thing, since the exposed plaster was creating dust and giving us all coughs. 

Here are the walls with their first coat of primer!


Our second dilemma was what to do with the wainscoting. I had stripped a small section to see what we were dealing with - several layers of latex (and maybe some oil) paint, over some kind of whitewash, over the original oil paint. Also, the previous owners had filled the gaps between the wainscoting with drywall mud!! Not a good idea!! It had cracked and they hadn't smoothed the edges or gotten rid of the excess, just painted over it. 

So, we started stripping. Some of the layers came off quite easily. And others didn't. And it was turning into a BIG job, too big for the few days I had Granny and Alison, and I didn't think it was worth exposing myself to that much lead paint in my condition had I done it myself later. 

So, we started painting! Anything was going to be better than that puke brown. Now before we painted, we did strip a few trouble spots and Alison did fill the worst gaps with some paintable, flexible caulking, which she smoothed out beautifully. 

Here are the painting fairies hard at work.

A mix of stripping and priming the wainscoting. 

The first coat of paint on the wainscoting. 

Some more paint going up.

Working late into the night...

An expert painter and handywoman!


It took 3 coats of the beautiful Benjamin Moore Mayonnaise (semi-gloss in a hardy cabinet sort of paint) to cover that awful colour. When the walls were primed and the wainscoting painted, I must say I was a bit stunned. It was all so much white. It was all so bright and blinding! Plus I had added white furniture to the mix. I almost second-guessed my decision to go for creamy-coluoured wainscoting. 

Wow! It's all so . . . white! 


It just took a bit of getting used to, but I have no regrets about the wainscoting colour now! 

In the weeks that followed we managed Step 2 of the walls, which was creating our own skim coat. Micah and I both tried our hand at it, several layers over several days. 

And then the room was ready for sanding. But we didn't get around to that till last weekend! There's something about sanding that is just so all consuming and dusty. Which is why we put it off for so long. But I REALLY wanted to have the room ready for Christmas, so we emptied the room out, sealed it off, and sent Micah in with a mask and shop-vac. 

That was last Saturday. On Sunday I asked my friend Kim, who had said she loved painting, if she might be available to come and help paint one of these days in December . . . and she said she would come on Wednesday!

So, onto Step 3! Micah and I primed the walls again on Tuesday night. It took forever because of all the cutting in, but I must say I was quite pleased with our job on the walls. You can still tell they are plaster walls, but I like that. And you can't tell there were big holes and gouges and rough patches of mud and wallpaper. We saved ourselves $500!! It's a good feeling. 

Step 4 - On Wednesday, Kim came over, and yes, she truly loves to paint, and she even loves cutting in! So I made her do that, of course! 

The real star of the show is the paint colour - Benjamin Moore Concord Ivory in a pearl finish. (Which, as you will see, is not ivory at all!)

At long last! The colour is going up!

First coat of colour!!


And so, thanks to Kim, by the end of the day, I had beautiful golden walls. :) I kept walking into the room that night and just gazing at the room in pure bliss. 

We have since moved the furniture back into the room and put up the lovely curtains that Mom made when she was here in October. I'm missing the white sheers that go in the windows as well (currently in the washing machine), and there is nothing up on the walls yet, and the china cabinet is empty, but you can start to get the picture. I will also say white furniture is not my first choice, but I am quite thankful for it nonetheless. One day I hope to get a big pine harvest table and sideboard/cabinet, and a bunch of mismatched old chairs. But for now we're going with white! 

Voila!


It's so lovely and bright and cheerful! 

Still in need of some decoration

I was afraid the black stove would look funny against the cream wainscoting,
but I think it works. This old braided rug was given to us recently by some
friends who picked it up by a guy getting rid of stuff. I love these kind of rugs!

Now I can't wait to entertain friends and guests in here!

Another look


The room still needs some finishing touches, but it definitely feels like me. Is it silly to be so happy over a dining room? I can't wait to get some Christmas decorations put up now! 


With lots of thanks to Micah, Mom, Aunt Karen, Granny, Aunt Alison and Kim! 


~lg


Thursday, August 25, 2011

{pretty, happy, funny, real} on August 25

~ Capturing the context of contentment in everyday life ~
Brought to you by Like Mother, Like Daughter


We are in the midst of dining room renovation, thanks to my Newfie painting team, aka Granny and Aunt Alison! It's been a busy week. More renovation pics to come in a later post. But here is a bit of contentment for this past week.

{pretty}


Cat catching the morning sun


{happy}


All the ladies! Thanks so much to Granny Raymer and Aunt Alison for all their hard work!


{funny}


Arden, armed and dangerous with a paint stir stick! I think she's ready for her own extreme home makeover show :)


{real}


The current state of our dining room. Right now everything is white! It's rather jarring after living in such a dark room for over a year! But so much brighter. The trim has been painted in Mayonnaise (I think only 2/3 coats at this point), and the walls are awaiting plaster repair. There you can see our sample spots of Concord Ivory. The colour looks slightly different to me than what I had painted on a piece of board in last week's post, but different in a good way.

Next step: Me figuring out how to do a skim coat of mud over the really bad patches of wall, then more primer, then the colour! I can't wait till it's done...


round button chicken


~lg

Wednesday, August 17, 2011

{pretty, happy, funny, real} dining room edition!

~ Capturing the context of contentment in everyday life ~ 

Well, it's been a month since my last {p, h, f, r} post, but I have a very good excuse - family! We've been blessed with lots of family visiting from all over the country, which means we've been very busy going to the beach and stripping wallpaper and shopping and eating and drinking tea and trimming trees and all sorts of wonderful things which are too numerous to name.

But right now, a little snapshot of the things that bring that little sigh of contentment . . . even in the midst of dining room renovation!

{pretty}

Mom and I went fabric shopping and came home with this wonderful fabric for dining room curtains.

Williamsburg India Chintz 1730-1800 by Windham Fabrics


As soon as I saw it I knew it was exactly what I wanted! I love the colours and the bold but pretty pattern. The only challenge I'll have (other than not knowing how to make curtains yet!!) is that there wasn't enough fabric for two full length normal width curtains for each window, and it can't be ordered again since it's archived. But there is enough to make panels for the sides of each window (they won't be as full as a normal curtain), so I'm sure we'll able to come up with something.


{happy}

Do you have a ReStore where you live? It's a place where people bring all manner of household things which are donated or leftover from renovation or construction projects. It's basically a household thrift store. Mom was dying to go, and good thing we did, for we found an amazing thrifty find!


This mirror! For only $5! It just needs a little bit of cleaning up around the frame, mostly bits of tape glue that need to be rubbed off. But isn't that a great deal? I was so happy :)

And over in the kitchen this afternoon, these things made me happy.

Veggies washed and ready for supper
Clean dishes sparkling in the late afternoon sun

Mystery seedlings growing beside the oregano 


All these small things made me smile because they were just part of an ordinary day, but it was an orderly day, and that makes such a difference.


{funny}

Funny happened out on the front porch this week when Arden had her first experience with watermelon!

Pure enjoyment!

Sticky face, sticky baby!
The more mess, the more fun, right?


{real}

Real is uncovering what's behind the wallpaper and figuring out what to do next!

Some of the plaster is in not bad shape, and other walls have big rough patches with wallpaper underneath layers of drywall mud. It really needs a good skim coat over all to smooth it out and strengthen the weak spots.

I also took a deep breath and a little scraper and peeled back the layers of paint on the wainscoting. It came off fairly easily in large chips, and now I'm thinking it might be a good idea to strip it all and start fresh. Time consuming, yes, but there are so many layers of paint (latex on top of oil) that are gooping it up.

The stripped section of wainscoting

So my original quick paint job in the dining room is turning into a much bigger project (twice the time and twice the money, as they say!), but I think it will be worth it when it's all done. It's one of the biggest, most lived-in rooms in the house, and I would like to keep the original farmhouse kitchen look.

Part of the fun is also choosing paint colours, which always seems like a daunting task to me. Because this room gets only a little direct light in the mornings, I want it to have a bright cheery feel, which is why I'm thinking of going with yellow, with cream wainscoting. I also want the room to feel cozy and warm in the winter. Yellow is so tricky . . .


Here are some of the samples we brought home. From left to right (all Benjamin Moore): Concord Ivory (with Mayonnaise underneath), Danse du Soleil, and Golden Honey.

The pictures don't quite represent the colours precisely, but they give an idea. The Golden Honey I think is too yellowy and doesn't look good in the artificial light of the evening (or on grey days). The Danse du Soleil is not bad in the sun, but seems a little too peachy for my liking.

So my current choice is Concord Ivory, which is also a historical colour, which I like the idea of. It has more of a brown undertone to it. I'm scared to death of the room turning out greenish, which is why I think the brown might be on the safer side of things.

Concord Ivory


And now I'm trying to envision what it would look like next to the curtains, as if those were the only colours in the room and not that horrible puke-ish brown that clouds my imagination.


Hmmn, I think that looks rather nice. I'm not sure if the Mayonnaise is too white, or if I should go with something more creamy. I want it to look crisp, but not blindingly white.

Plenty of work ahead, but I am so looking forward to the results!

Any thoughts? Thanks for stopping by :)


round button chicken


~lg

Related Posts Plugin for WordPress, Blogger...